Teletext Capture and Processing Guide
This page will serve as a guide to explain how to capture teletext data from the VBI of a home-recorded VHS tape using a computer running a Linux operating system with ali1234's vhs-teletext software installed, and then create a .t42 file of the teletext data.
If this sounds confusing, please read the guide before this Teletext Recovery Environment Setup Guide
Objective
By the end of this guide, you should be in a position to successfully capture teletext data from a VHS tape as a VBI file, and then process that file into a manageable .t42 file for viewing / final touch-up using a Teletext editor tool.
Process
Before We Begin
You should already have everything installed and setup, if not please consult the previous guide Teletext Recovery Environment Setup Guide.
I am also assuming your VCR is powered on, connected to your capture card, a tape is in the machine, has been confirmed to have video content on it and is ready for you to hit play at a moments notice.
Capturing
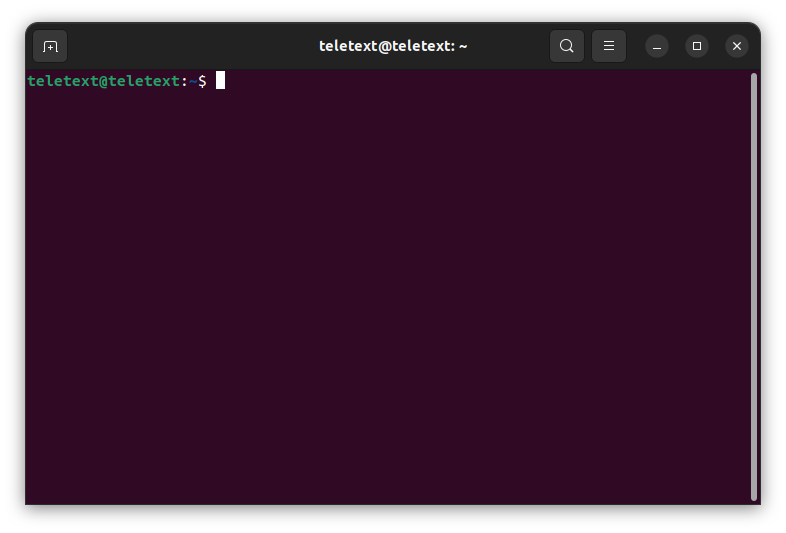
To begin capture, start up the terminal on your Linux PC.

An empty Linux terminal ready for your inputs.
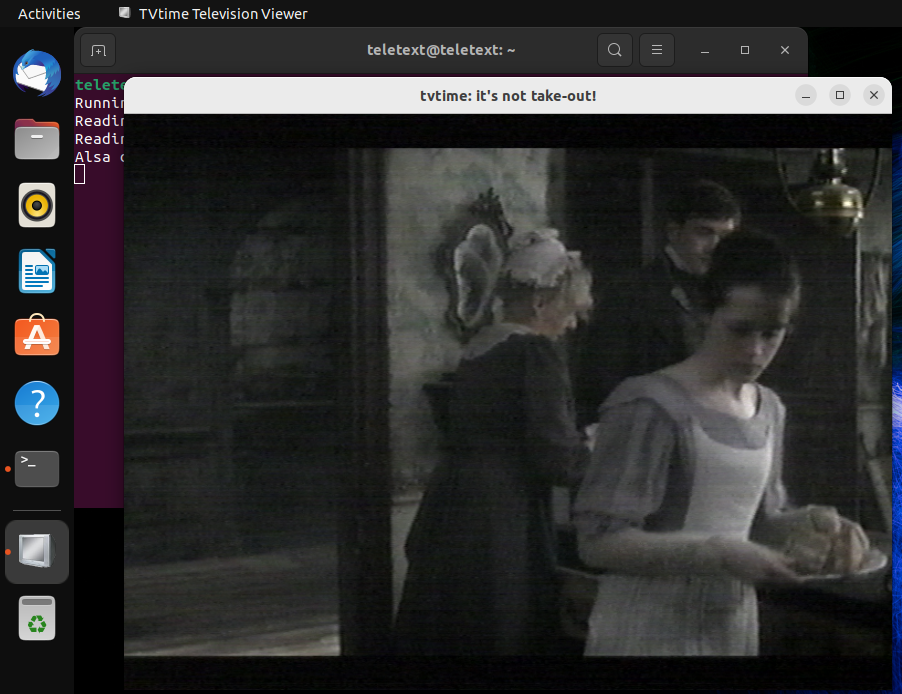
[Optional] In the terminal type tvtime to start the tvtime app you installed previously, confirm TV time is set to the correct input. Hit play on your VCR and confirm the picture is coming through. tvtime will also allow you to see the quality of the tape. If the picture looks relatively clear (no ghosting, no static) expect a good recovery, however if there are artefacts on screen fear not, something may still be recoverable. Once confirmed, close tvtime.

A clear image from the VCR is being sent. It can sometimes look a little washed out incomparison to what you might see on a TV normally, this is to be expected.
Stop the tape in the VCR deck.
Type the following command BUT DO NOT HIT RETURN teletext record -d /dev/vbi0 > capture001.vbi.
This command is going to take the data coming into the VBI0 interface and output it into a file called capture001.vbi. You can name the file anything you like, but it is best to use something you can recognise and use the .vbi file extension. The file will be written to wherever terminals current directory is, you can of course specify a full path to save the file somewhere else (e.g. ~/vbicaptures/capture0001.vbi if you had a folder called vbicaptures in your home directory).

You've "primed" the capture, meaning capture is ready to go at the stroke of a key.
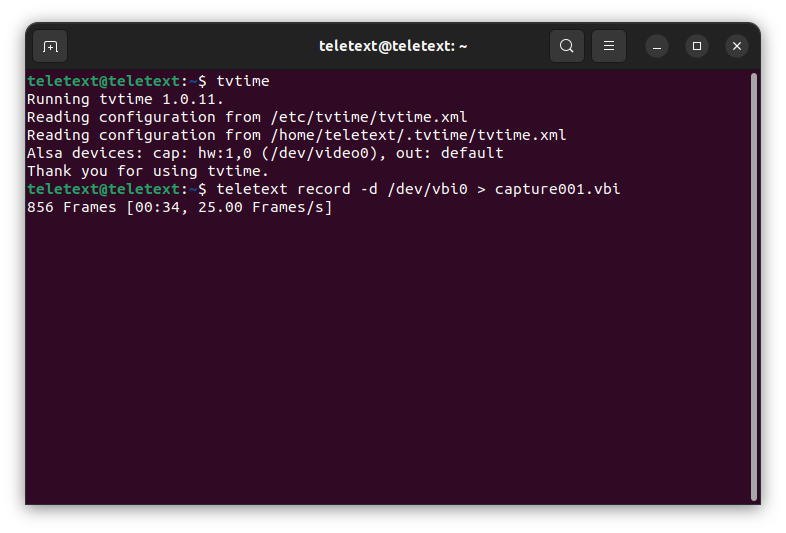
Now hit the Play button on your VCR, allow for the tape to get to full speed and any auto-tracking to complete. The second this has completed, hit RETURN on your keyboard to start capture. The terminal should now change to a dynamic output that is counting up frames, giving you the time the capture has run for and the current frames per second.
[Tip] For UK PAL broadcasts you should expect a frame rate of 25/s, or as close to that as possible. Too high or too low can indicate an issue with the capture or that the tape may have finished. Some VCR's output a "blue screen" when the tape is finished, that can sometimes run at a different frame rate. If you hadn't run tvtime before, and the frame rate is not 25 then run it again and ensure the input is set correctly. Delete the previously captured file, return to the terminal and start the capture again.

This is what you will see when the capture process is underway. This tape is good quality and maintains a solid 25 frames per second rate, with no dropped frames.
[Optional] You want to capture around 15 minutes of content, you can of course capture more or less. However less can incur missing pages, and more can create large unweildy files. If you feel that your capture comes from a day of historical significance which would cause the news to change rapidly, then you may wish to make a longer capture. It is all personal preference. I also make about 1-2 minute capture initially to confirm text exists, this is to avoid wasting time spent capturing effectively "dead air" which could have been spent working on a tape with text data.
To stop the capture, press CTRL+C on your keyboard and it will stop the capture process.
[Optional] VBI Check
Now let's check the quality of the VBI captured. ali1234's vhs-teletext includes a vbiviewer, although you may need to run this command in the terminal before viewing vbi's export PYOPENGL_PLATFORM=osmesa
In the terminal run the command teletext vbiview -p [filename.vbi] where [filename.vbi] is your capture file, e.g. capture001.vbi
Here is a view of a VBI that looks good.
Processing Your Capture a.ka. "Deconvolve"
Now to confirm the actual quality of the text captured, we are going to run a short "deconvolve" process. "Deconvolve" is the term used to turn the raw data in the VBI into teletext data, however the process can include duplicate and broken pages. This file explains how the process works.
To begin the deconvolve process, in the terminal type teletext deconvolve capture001.vbi > capture001.t42
Allow a few % of the deconvolve process to pass, at the moment we are likely using CPU-based processing which is much slower than CUDA-enabled processing (to be explained in the next guide), but this shouldn't take anymore than a minute or two to get to about 2% or 3%. Press CTRL+C in the terminal to stop the processing.

This is what you will see when the capture is being deconvolved. It also gives some stats about how long it might take and how many lines it is processing.
To check what the processing has found type teletext filter -r 0 capture001.t42
The output in the terminal will now show the pages that have been processed, and the first line of the page. This will include the "Service" (such as CEEFAX for BBC or Teletext for ITV), the page number (usually 3 digits), the date and the time (all of this information can be helpful for naming your full captures to something useful like bbc1-20031026.vbi/bbc1-20031026.t42)

We can now see that this is going to be a good capture, however it is not perfect there are a few lines that look to be complete gibberish, this should be easily taken care with while "squashing" the deconvolved file.
Squashing and Final Prep
We now have a "deconvolved" teletext file, with the file extenstion .t42. This is great but it likely includes multiple copies of the same page, and possibly even some junk pages. To remove these we can "squash" the file.
If closed, re-open your terminal and type teletext squash capture001.t42 > capture001-sq.t42
The "squashing" will begin, and should happen relatively quickly. The squahsed file in the above example will be the capture001-sq.t42 file.
If you like, you can also run an automatic spellchecker over the squahsed file by running the command teletext spellcheck capture001-sq.t42 > capture001-sp.t42 HOWEVER this is known to do more damage than good, and can erroneously change things like mins. to mink (which screws up multiple pages of film listings for example); for that reason it is often not used by recoverers who will instead opt for manually fixing the teletext file in a Teletext editor tool.
Take the T42 files and store them somewhere safe, they should only be a few MB in size (depending on the amount of pages). It is then helpful to share them with the community via the Discord server, or upload them to a central public archive such as The Internet Archive. Once you've got some really nice captures, you can also consider contributing the data to the Teletext Archive (link below in Further Reading) so that people can view the Teletext file in a web browser.
What Next?
Now that you have confirmed there is text on the tape and the captured data is resulting in something half-decent, you can go back and complete a longer capture and then set off the deconvolve task over the entire file. As you will be doing this with just CPU power this process could take many hours to complete. If you want to go faster and have access to an NVIDIA CUDA enabled graphics card you can look to the next guide in this series that explains how to enable that functionality.
Further Reading
If you are a bit lost with all of this, maybe these links may help
- My Teletext recoveries so far
- Teletext Wikipedia article that explains what Teletext is
- ali1234's GitHub repository for the vhs-teletext programme
- The Teletext Archaeologist's website that explains a bit more about how this all works
- The Teletext Archive, as operated by The Teletext Archaeologist himself, a database of recoveries made so far
- The Teletext Archaeologist's twitter profile for various bits of multimedia relating to the format
- ZX Guesser's page about teletext recovery.
- A YouTube video by ZXGuesser performing some advanced recovery techniques with his own toolset
- A YouTube video by The Centre for Computing History of a talk by The Teletext Archaeologist from Block Party 2022 that explains how this all started.
- The vhs-decode project on github is another project that uses RF capture of the video stream, its a little bit more in-depth than what is proposed here, but has reports of being effective.
- The Discord server where the community are ready to help you with any questions or queries you may have